I received several questions on how I edit my photos. So, I wanted to put together a quick post on my process and what applications I use.
First of all, I have to be honest and mention how much I love a good photographer. I firmly believe it is nice to find a photographer you know and love, that your family becomes comfortable with overtime; especially when kids are involved! Kennedy will freeze-up instantly if she is even slightly skeptical of who you are or what you’re doing with a giant camera in her face. Since we’ve repeatedly used Theary, Kennedy has become far more comfortable with her over time. Plus, Theary will come over and cook us the most amazing coconut curry dinner after shooting photos for us all day. I mean, who is this superwoman! You should definitely check her out if you’re local to Metro Atlanta!
That being said, I can’t miss cute moments in between photo sessions. So, I have invested in a high quality…. IPhone X lol. Seriously, I have tried using an actual camera but I am just not quite there yet. Trying to pull that thing out to randomly catch moments of an almost 2-year-old is just not realistic! I also like the flexibility of being able to instantly edit and post in real time from my phone. Not having to whip out my camera, sim cards, cords, and computer to download, edit, and then post a photo is a huge perk in my opinion.
Start by download the app Adobe Lightroom CC on your iPhone! I don’t remember the cost, but I’m guessing no more than .99/month. With Lightroom CC you can do SO much!
 As I have mentioned before, I have narrowed down my editing for all photos to a few easy steps. The reason for this is I want to be able to post on the fly, and I don’t want to misrepresent ourselves by looking extremely different in reality vs. Instagram. I’m simply going for a lighter, airy, cooler tone to my photos! So here’s how I achieve that!
- Click “Add photo” button (which is the left hand button down in the bottom right corner of the app) to add your photo and start editing.

- Once you have added your photo, click “Light” on the bottom tool bar, and increase the “Exposure” to your desire. I typically increase to around +1 (give or take depending on the original photo).
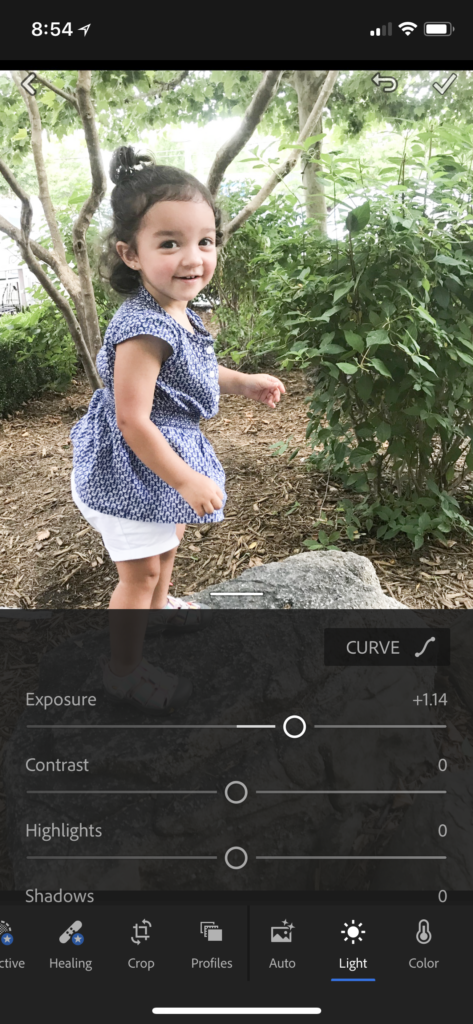
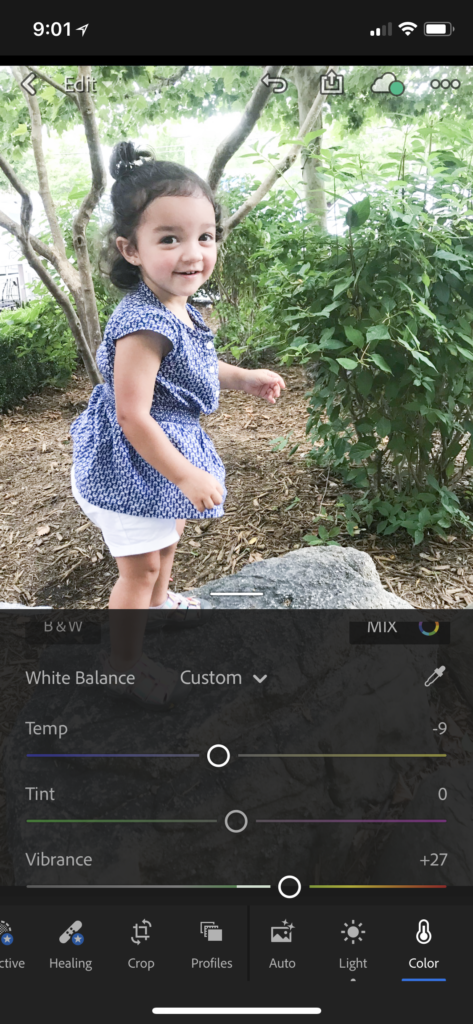
- Next, click “Color” on the bottom tool bar, and shift “Temp” closer to cool/blue tones (to the left) ever so slightly (typically anywhere from -5 to -10).
- Lastly, increase the “Vibrance” just a bit so you don’t wash out the colors too much by bringing out more blue tones.
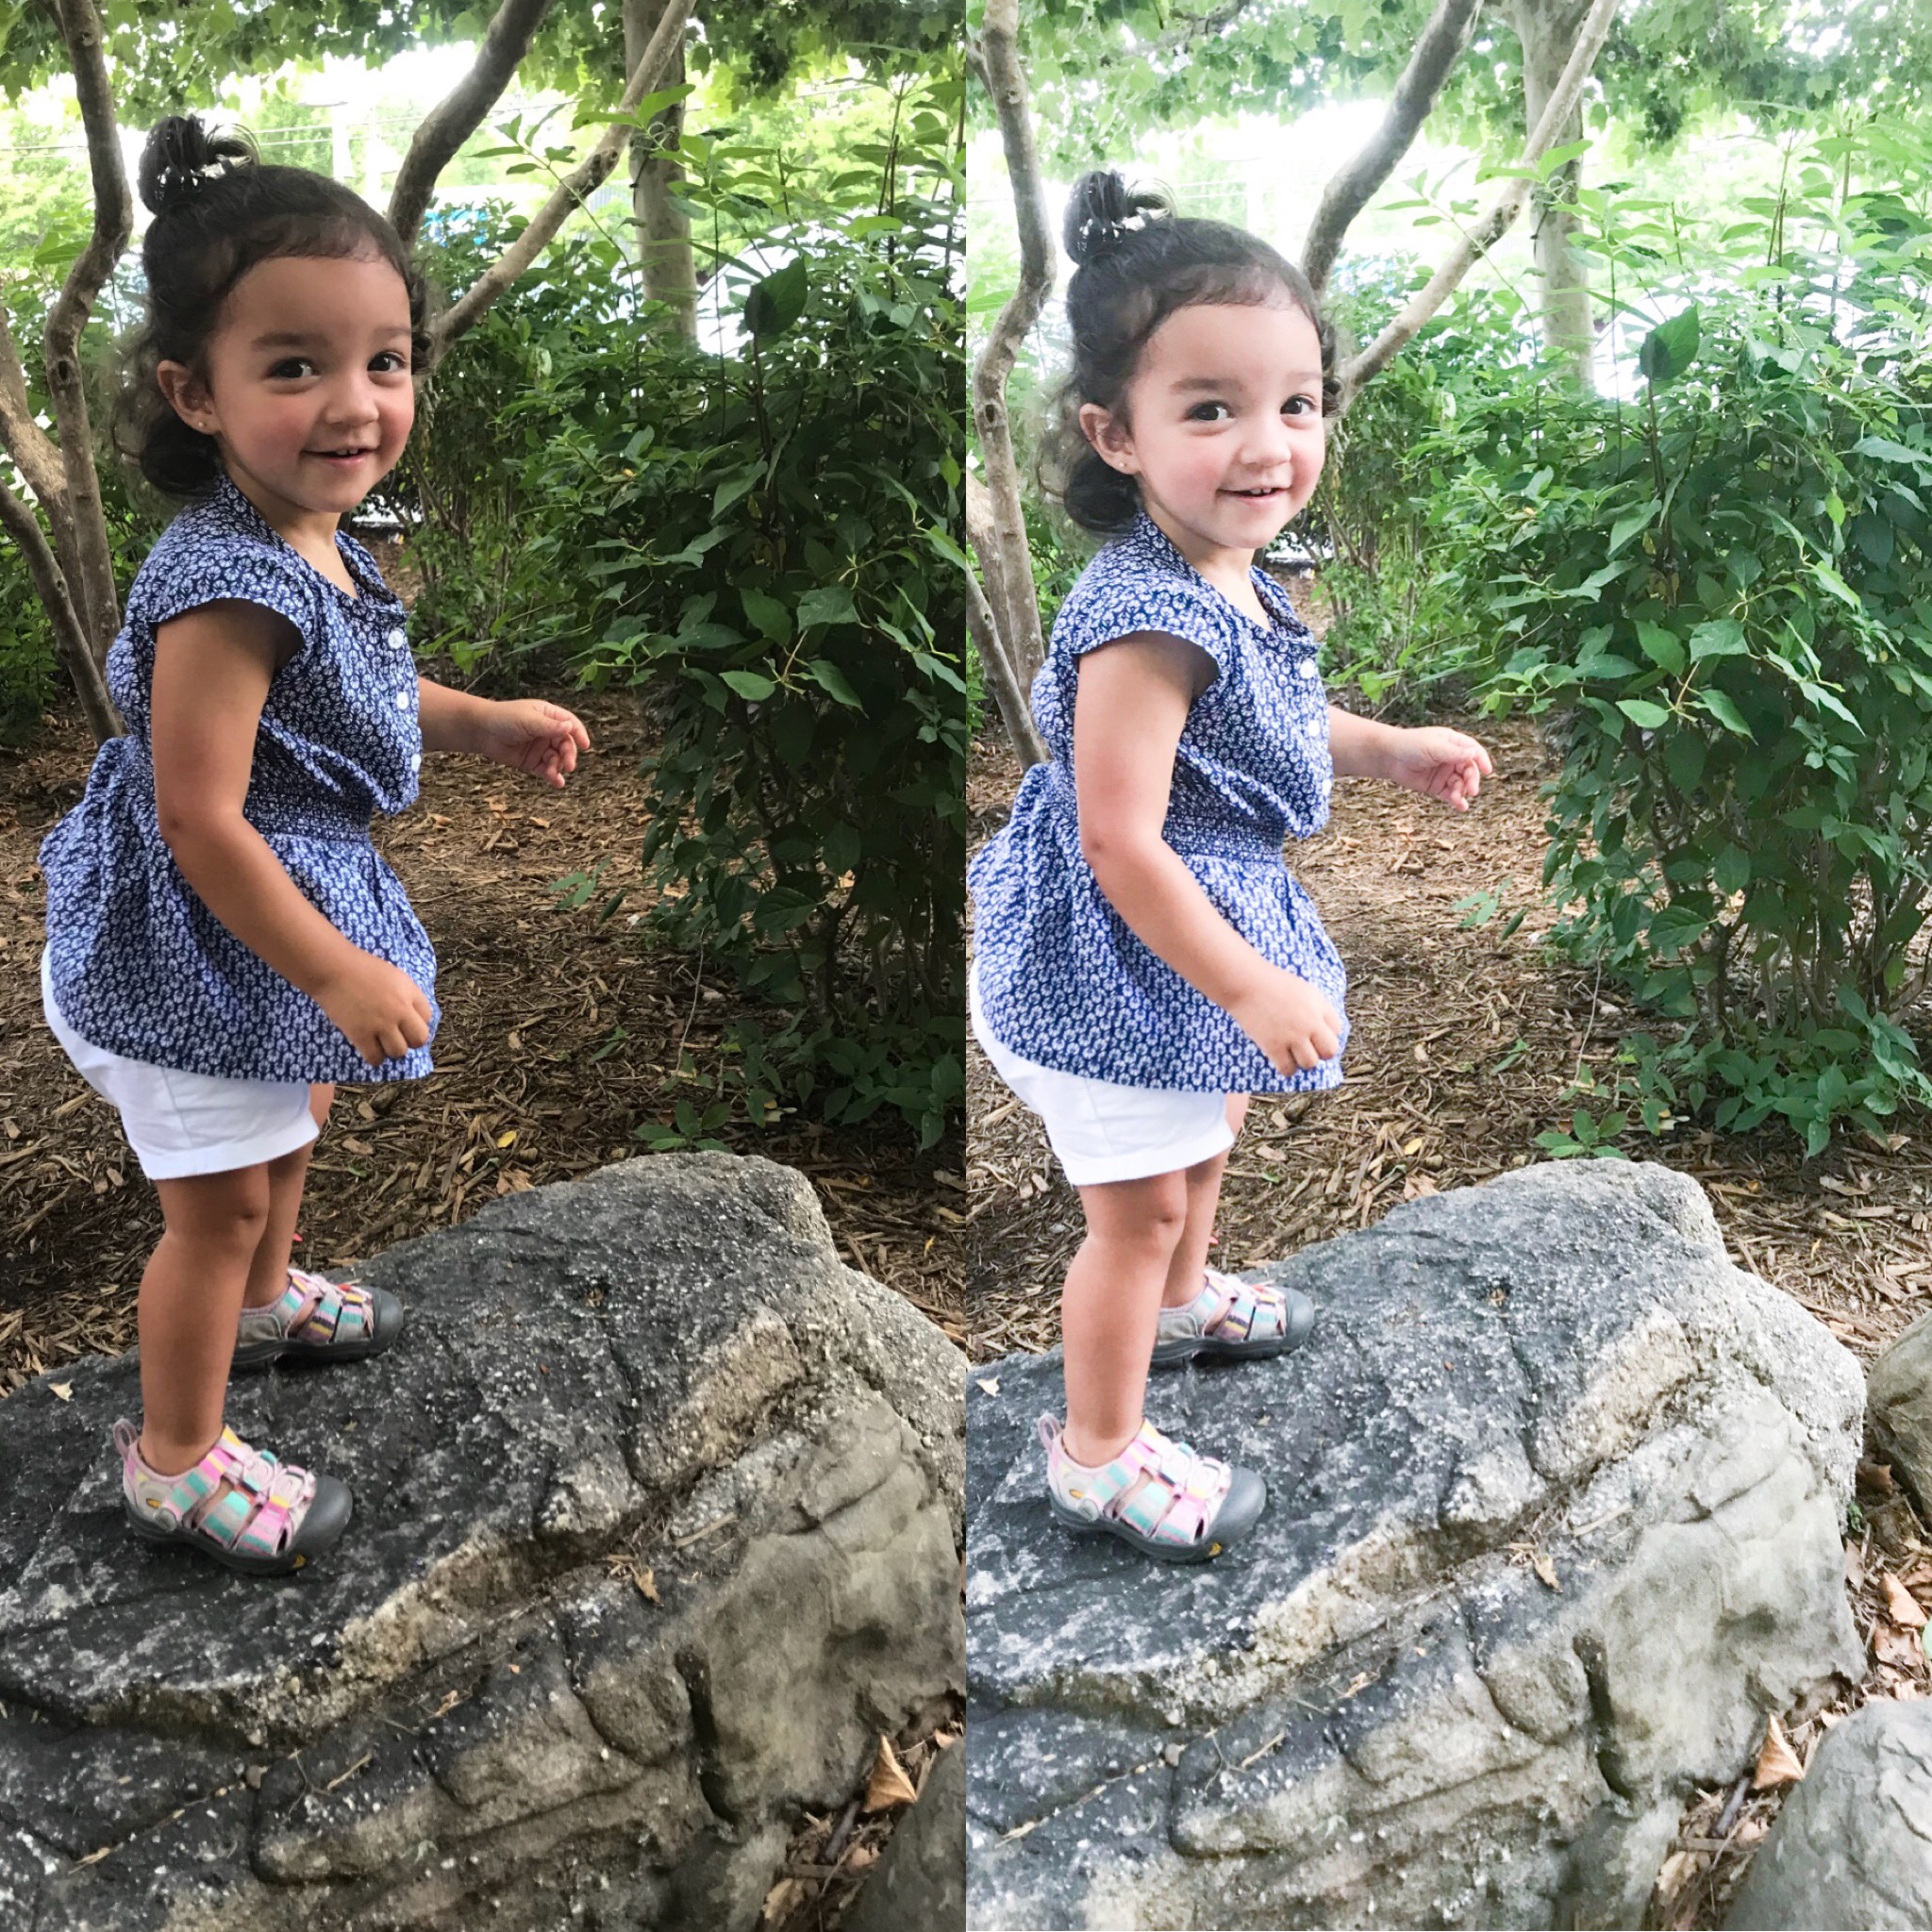
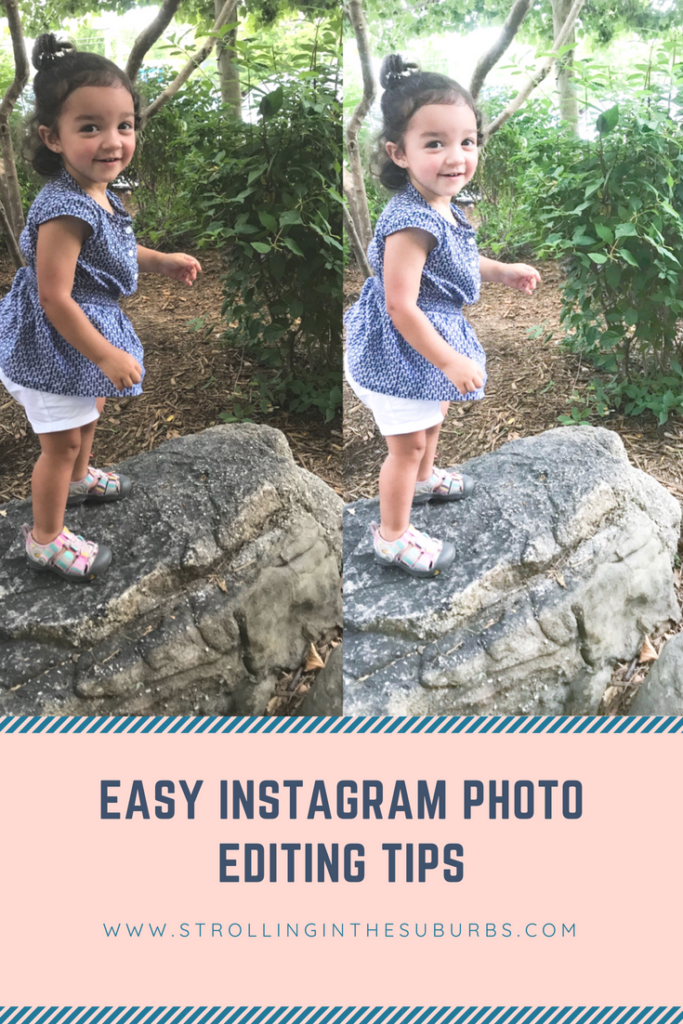
And voila! It is as simple as that folks. Here are some examples of before and after photos I have edited using this exact method. You can see since I do not make too many adjustments it works for almost any photos with any background. Please feel free to comment with any questions, or as always reach out on Instagram!